| Difficulty Level: |
 |
very simple |
Parts and Tools
- Solid wood block (200 x 150 x 80mm approx)
- Large screw hook
- Sheet of plywood (1000 x 500mm)
- Assorted material strips
- PVA glue
- Spring balance
- Tenon saw
- Sandpaper
|
Optional
- 3-4mm thick aluminium sheet
- hacksaw
- hand drill and 5mm metal bit
|
Instructions
This guide shows how to construct two items of apparatus that can be used to demonstrate the principles of friction. Class sets of this apparatus can be constructed very cheaply, providing students with a range of surfaces on which to drag a friction block and thereby calculate frictional force.

Fig 1: Friction block
Fig 1 shows the friction block required as part of this set. The block should be made of a solid piece of wood, approximately 200x150x80mm. This size can be adjusted as much as you like as long as the bottom surface is flat and large enough to create resistance when dragged across the surface of a material. Use a tenon saw to cut the piece and sand any rough edges.
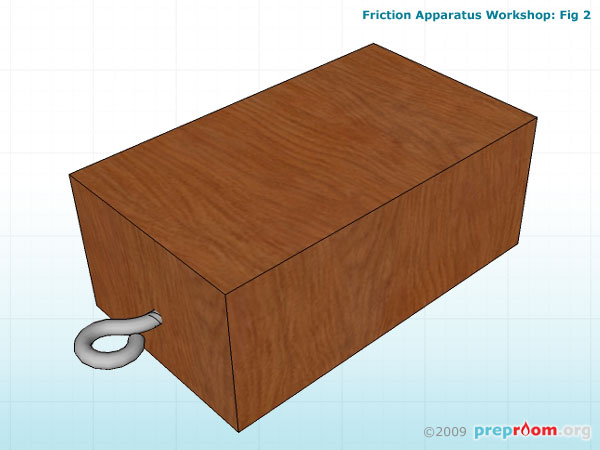
Fig 2: Large screw hook in place
Fig 2 shows the large screw hook in place. This is to attach the spring balance. Ensure that the hook is firmly fixed into the wood and in a position that will allow enough room for the hook from the spring balance to attach.
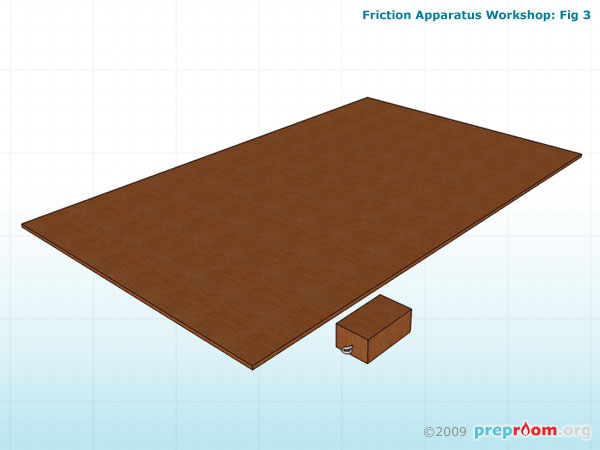
Fig 3: Large plywood board
Fig 3 shows the large plywood board. This will form the base to which the material strips will be glued. Again, the size of this board can be adjusted to suit your requirements and can be made of whatever wood type you choose. In this case we have used 10mm plywood because it is lightweight. Ensure all edges are sanded to remove splinters.
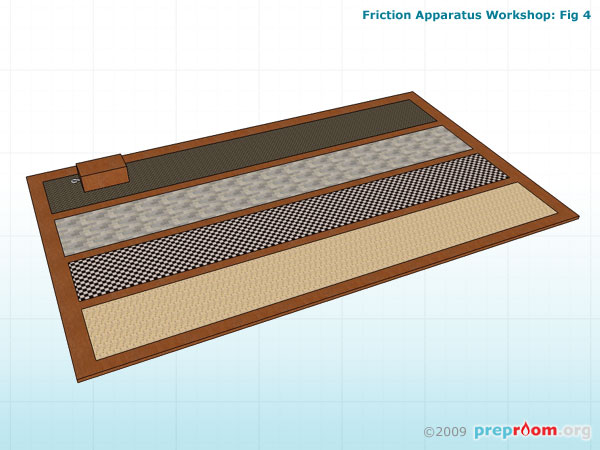
Fig 4: Selection of materials glued into place
Fig 4 shows a selection of materials that have been glued into place. These can be any of the following: carpet, sandpaper, acetate, textured wallpaper, felt, foam, bubblewrap, card, fabric, rubber, lino.
Each material can be cut into a strip which is slightly wider than the base of the friction block and glued to the surface of the plywood base. Make sure the material sits completely flat and has no raised areas.

Fig 5: Friction block being dragged across a material using a spring balance
Fig 5 shows the friction block being dragged across a material using a spring balance. The point at which the block moves in a steady manner is when a reading should be taken from the meter. The resultant frictional force will be different for each material. Try to select materials which will provide a range of different readings.
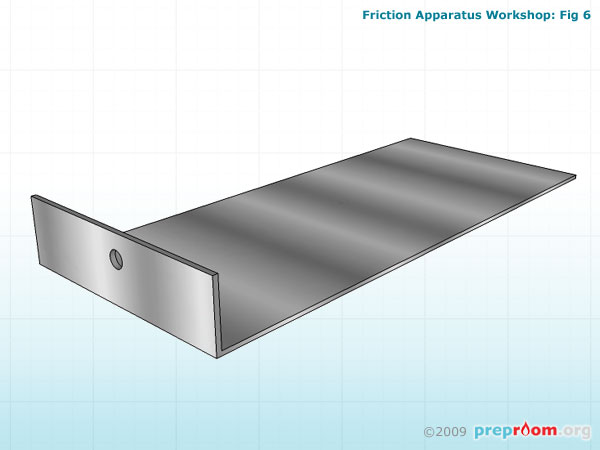
Fig 6: Optional aluminium part
Fig 6 shows another possible part to this apparatus. In this diagram a small sheet of aluminium, approximately 3-4mm thick is cut into a rectangular shape and one end is bent using a vice leaving a standing wall about 20-30mm high. This is drilled to accommodate the hook from a spring balance.
This friction sled can be used on the same base boards but is intended to be loaded with slotted masses, showing how frictional force relates to the pressure applied by the sled on the material.
Disclaimer
Before attempting any of the construction projects featured on this website, ensure you have, and know how to use, the appropriate tools, components and safety equipment and are competent to undertake the project. These guides are for information only and we hold no responsibility for any accidents, injuries or damage caused by the use or misuse of any equipment, project or information contained within this website. In short - use common sense and stay safe!