| Difficulty Level: |
 |
needs some expertise |
Parts and Tools
- Sturdy card approx 3-4mm thick
- Paper glue
- Scalpel or craft knife
- Ruler
- Lead foil
|
- Aluminium foil
- Exposed film negative
- Safety pin
- Sticky tape
|
Instructions
Staff who work with radioactive sources are usually required to wear personal radiation monitor badges to monitor their exposure. Photographic film turns darker when it absorbs radiation, as it does when it absorbs visible light. The more radiation the film absorbs, the darker it is when developed.
To get an accurate measure of the dose received, the badge contains different materials that the radiation must penetrate to reach the film. These may include aluminium, copper, lead-tin alloy and plastic. There is also an open area on the badge.
This guide shows how to construct a simple mock radiation badge which can be passed around a class. The badge does not work as a radiation detector but represents a used badge.
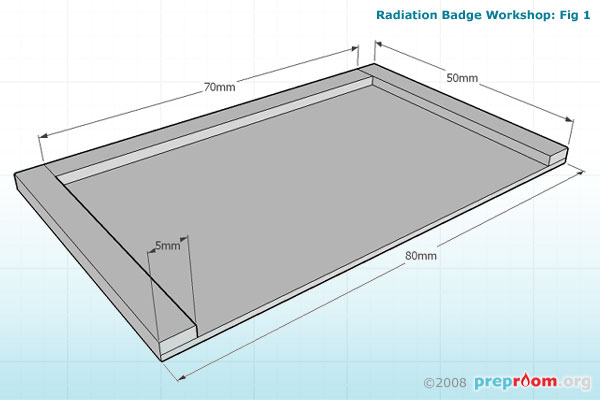
Fig 1: Base of the badge
Fig 1 shows the base of the badge. Sturdy card needs to be cut using a craft knife or scalpel to the measurements indicated in the diagram and glued into place. 3mm card should be sturdy enough if parts are glued securely.
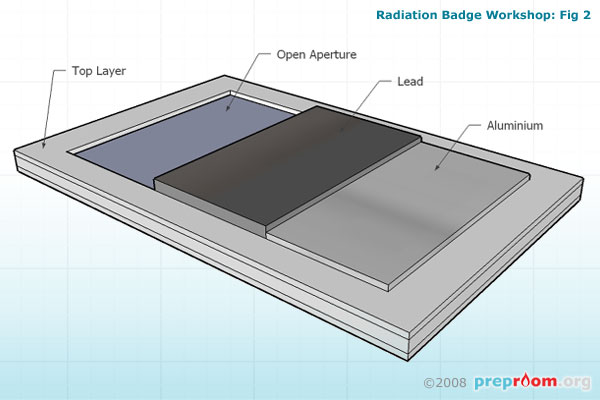
Fig 2: Next layer including lead and aluminium foil
Fig 2 shows the next layer including a small piece of lead foil and a small piece of aluminium foil. These can be simply glued in place. Leave a hole next to the lead sheet as to expose the inside of the badge.
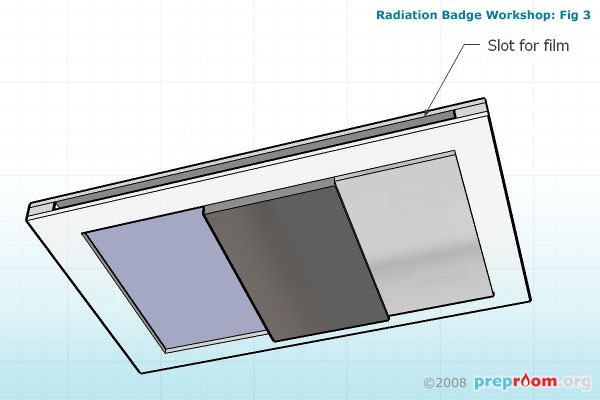
Fig 3: Slot for film
Fig 3 shows the top of the badge and the hole for the film to go. Old x-ray film is perfect for this type of badge as it looks just like exposed film. Cut a piece which has dark and light areas so that when placed within the badge, the darkest area is behind the open aperture window showing that the 'radiation' which 'exposed' the film must have been alpha. The light areas of the film should be behind the metal foils showing that the 'radiation' did not penetrate these materials.
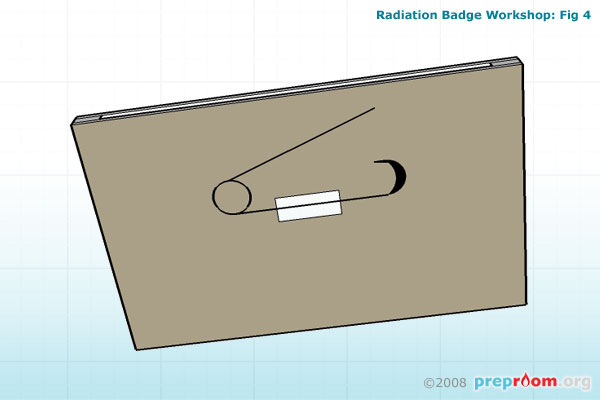
Fig 4: Attached a safety pin to the back of the badge
Fig 4 shows the back of the badge. Use a small amount of tape to stick a safety pin in place to make the badge look more authentic.
The table below shows typical doses of radiation from different activities.
| Activity |
Dose in sievert - Sv |
| Sterilising surgical instruments |
25000 |
| Typical radiotherapy dose |
60 |
| Legal dose limit for a worker |
0.02 |
| Mean annual dose from natural radiation |
0.002 |
| Typical chest X-ray |
0.00002 |
| Flying from the UK to Spain |
0.00001 |
Disclaimer
Before attempting any of the construction projects featured on this website, ensure you have, and know how to use, the appropriate tools, components and safety equipment and are competent to undertake the project. These guides are for information only and we hold no responsibility for any accidents, injuries or damage caused by the use or misuse of any equipment, project or information contained within this website. In short - use common sense and stay safe!