| Difficulty Level: |
 |
needs some expertise |
Parts and Tools
- Working speaker
- MDF base (approx 200 x 150 x 12mm)
- 2 x 4mm sockets
- Plastic coated copper wire (500mm)
- 2l or 3l soft drinks bottle (clear)
|
- Glue gun and glue
- Small polystyrene balls
- Soldering iron and solder
- Hand drill and 4mm wood bit
|
Instructions
The 'mounted speaker and balls' model is used in physics lessons to teach about sound waves and their effects. It can also be used to demonstrate how the electromagnetic coil in the speaker operates. Without the balls it can be used alongside a signal generator as a simple speaker.
This type of speaker is often connected to a signal generator where clean sounds can be created. Passing a specific frequency through the speaker can result in the balls bouncing around. The louder the volume, the higher the balls will bounce, the higher the pitch the faster the balls will bounce. With the frequency generator emitting a low frequency (around 1Hz or one cycle per second) the cone can easily be seen to oscillate in and out. Increasing the frequency makes the cone move at a higher rate. The balls are just there to make this movement more obvious.
The loudspeaker rating should roughly match that of the signal generator or Hi-Fi. These ratings are in Ohms and will be written on the back of the speaker and the output of the amplifier. Signal generators usually have a low output so should not cause any problems to most hi-fi type speakers.
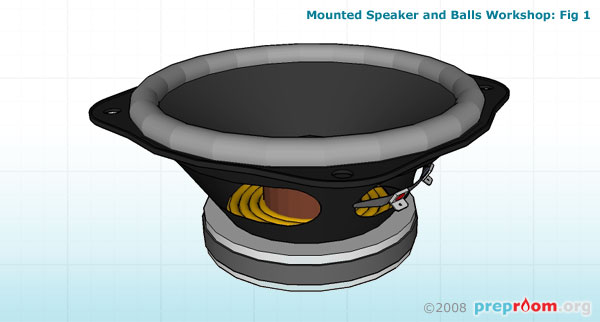
Fig 1: Speaker
Fig 1 shows the type of speaker used in this model. Any type of moving cone speaker will be fine for this application. Make sure it is working by connecting the terminals to 1V D.C very briefly. If the cone moves, the speaker is usually working. Ensure there are no rips in the paper cone and remove any sharp edges or screws. The speaker can be removed from an old speaker cabinet which can be bought very cheaply second-hand.
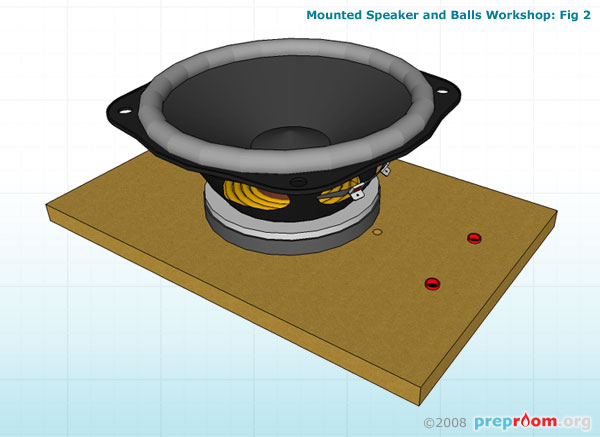
Fig 2: Speaker mounted on board
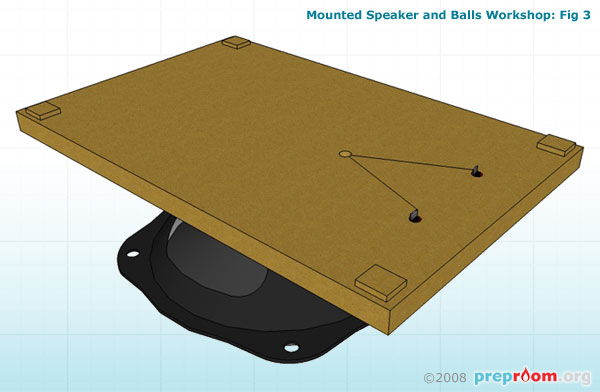
Fig 3: Feed wire through the third hole in the board
Fig 2 shows the speaker mounted onto the board. Glue from a glue-gun can be used to secure the speaker. In the base, drill three holes, two for the 4mm sockets and one where the wires from the speaker are held. The holes for the 4mm sockets need usually to also be 4mm although depending on the type of socket you are using you may need a larger hole. Insert the 4mm sockets through the base board and solder a length of plastic coated copper wire to each. Feed this wire through the third hole in the board and out through the top near the speaker (see fig 3).
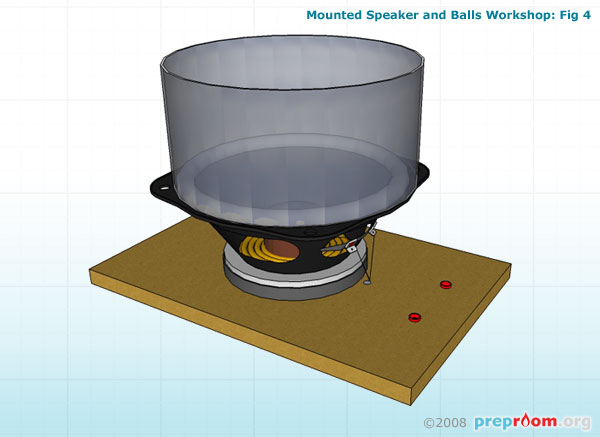
Fig 4: Solder the wires to speaker terminals
Fig 4 shows the other ends of the wires soldered onto the terminals of the speaker. Depending on the size of the speaker top, select a soft drinks bottle which matches the diameter and cut a section of the bottle approximately 150-200mm tall. Glue this into place using a glue gun ensuring that no glue settles on the speaker cone. This plastic barrier ensures that the balls remain on the speaker cone when the unit is in operation.
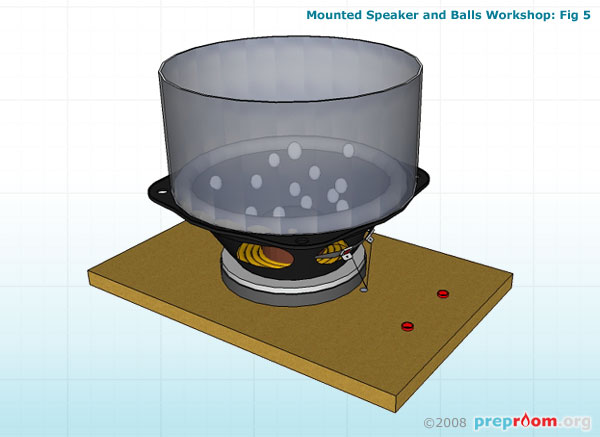
Fig 5: Balls in position
Fig 5 shows the balls in place. A handful of balls should be enough to see the effect. You may want to experiment with the size of the balls to see which work best.
Connect the speaker to a frequency generator, select a frequency and see the balls move.
Disclaimer
Before attempting any of the construction projects featured on this website, ensure you have, and know how to use, the appropriate tools, components and safety equipment and are competent to undertake the project. These guides are for information only and we hold no responsibility for any accidents, injuries or damage caused by the use or misuse of any equipment, project or information contained within this website. In short - use common sense and stay safe!