| Difficulty Level: |
 |
fairly easy |
Parts and Tools
- 3V mini motor
- MDF piece (55 x 55 x 20mm)
- 2 x 4mm sockets
- Length of insulated copper wire
- Soldering iron and solder
|
- Tenon saw
- Sandpaper
- Mini motor clip
- Glue gun and glue
|
Instructions
This guide shows how to construct a simple but robust mounted mini motor.
The construction is very similar to the 'pupil-proof lamp holder' also in this section, the main difference being the larger size of the MDF block in this model.
The mounted motor is a useful piece of equipment because the integral 4mm sockets ensure a good connection to your power source without the need for crocodile clips. The motor is also mounted in such a way that it can be clamped to a desk using a 'g' clamp and used as a motor pulley or crude dynamo.
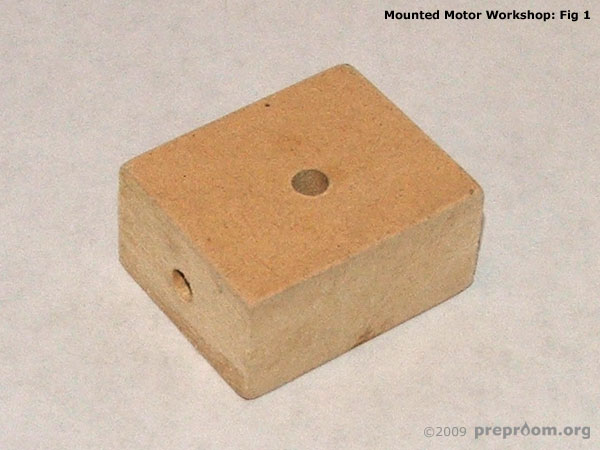
Fig 1: MDF piece
Fig 1 shows the MDF piece which has been cut, sanded and drilled. The MDF needs to be cut into pieces which are at least 55x55mm and at least 20mm deep. Three 4mm holes need to be drilled in each piece. One hole should be drilled on each of two sides and one in the middle of the top. The three holes need to link up and so a small screwdriver may need to be inserted to remove any debris. The required size of this block will depend on the motor's intended application. A longer base may be more useful if the motor is to be clamped to a desk.

Fig 2: 4mm socket
Fig 2 shows one of the two 4mm sockets which need to be soldered to a short length of insulated copper wire. Ensure the soldered joint is strong.
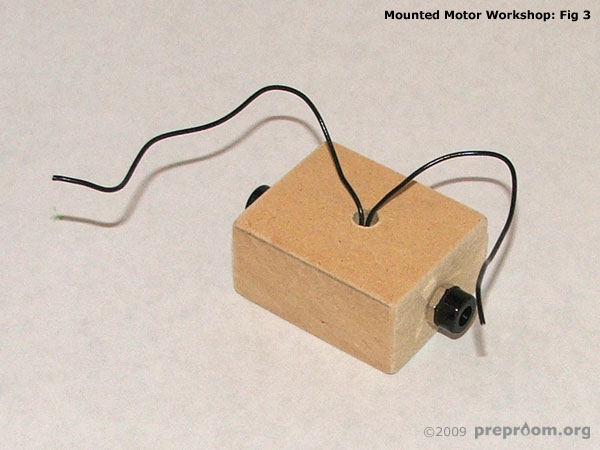
Fig 3: 4mm sockets inserted into MDF block
Fig 3 shows how the 4mm sockets should be inserted into the two side holes. The ends of the wire need to exit through the top hole so some gentle persuasion may be required to achieve this. The sockets should be a tight fit in the drilled holes and should not need additional glue.
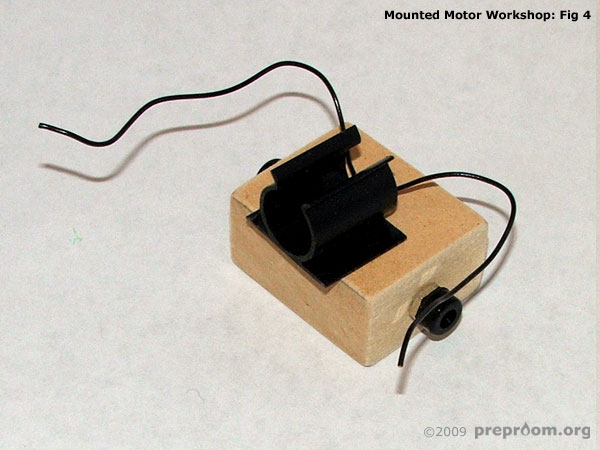
Fig 4: 4mm sockets in place and mini motor clip glued in place
Fig 4 shows the 4mm sockets in place and the mini motor clip securely glued in place on the top of the block. The clips can be purchased through Timstar lab supplies (order code: EL06642). The clip can be glued anywhere on the block but if the motor is to be used as a pulley, it will need to be glued so that the motor shaft overhangs the edge slightly.
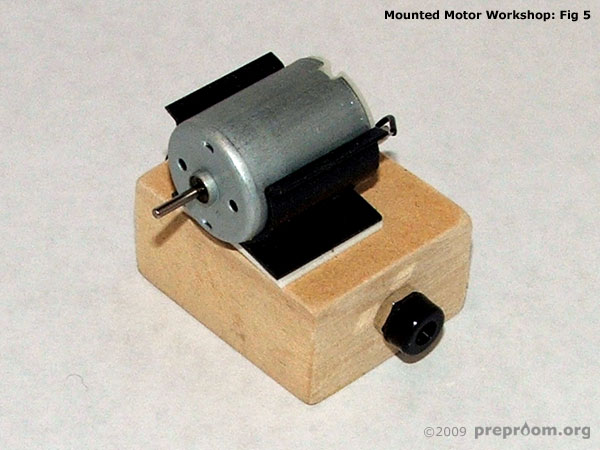
Fig 5: Finished mounted motor
Fig 5 shows the finished mounted motor. The two ends of the insulated wire need to be stripped of about 10mm of insulation and soldered to each of the motor terminals. Ensure that the wires are taught and so cannot touch each other. A dab of glue may help achieve this.
The device should be robust enough to survive many uses and at a total cost of less than £1, is much cheaper than commercially available motors.
The motor should only ever be connected to low voltage D.C electricity. Usually these mini motors are rated at 3V but some may require as little as 1.5V so check which type you have before connecting to a power source.
Disclaimer
Before attempting any of the construction projects featured on this website, ensure you have, and know how to use, the appropriate tools, components and safety equipment and are competent to undertake the project. These guides are for information only and we hold no responsibility for any accidents, injuries or damage caused by the use or misuse of any equipment, project or information contained within this website. In short - use common sense and stay safe!