| Difficulty Level: |
 |
needs some expertise |
Parts and Tools
- 3x wooden parts (300 x 40 x 10mm)
- Wooden piece (40 x 60 x 6mm)
- Drill and bit
- Large nut and bolt
- Thick rubber band (very large)
- 3 x large nails or screw eyes
|
- Tenon saw
- Ruler
- Sandpaper
- PVA wood glue
- 'G' clamp
|
Instructions
This guide demonstrates how to construct a simple model arm showing how the triceps and biceps muscles work. Traditionally this model has been made from stiff cardboard and elastic bands. This is a more robust version designed to last longer than the cardboard types and works very well as a demonstration piece.
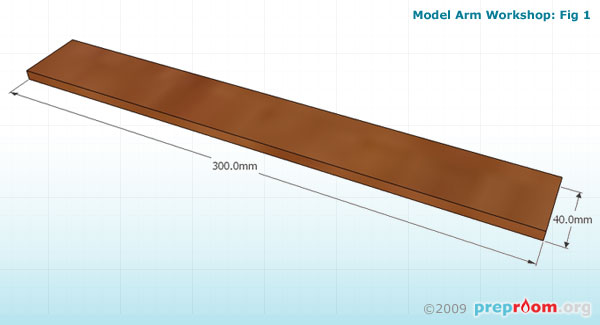
Fig 1: Size of parts
Fig 1 shows the size of the main parts required. Three pieces of this size need to be cut. The type of wood can be MDF or timber of approximately 10mm depth. Use the appropriate PPE when sawing and sanding the parts.
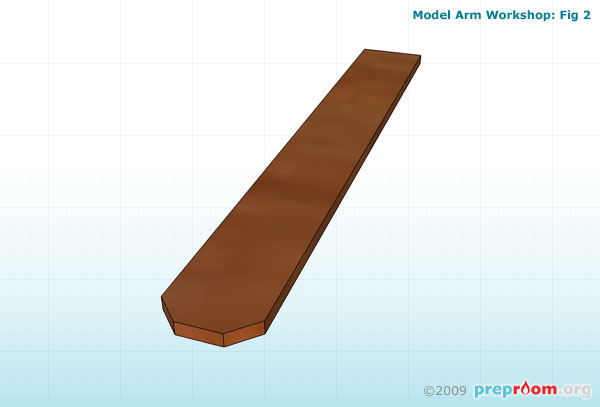
Fig 2: Shape of ends
Fig 2 shows how the ends can be shaped. Two small triangles can be cut creating a trapezoid shaped end. Alternatively a coping saw may be used to cut a completely rounded end. It is recommended that the ends be cut so that the rubber band does not have to come into contact with a sharp corner. This prolongs the life of the band and also helps it remain in place.
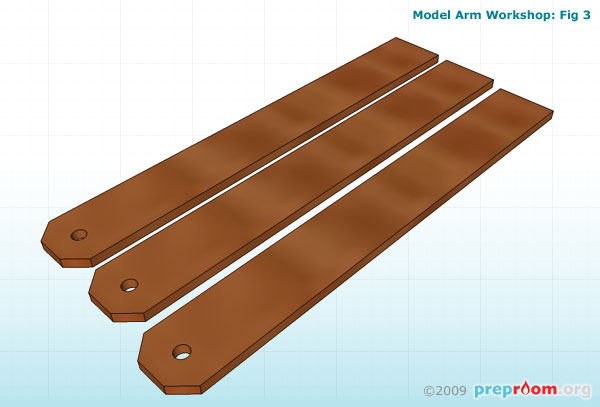
Fig 3: 3 main wooden pieces
Fig 3 shows the three main wooden pieces. Holes have been cut in the same place on each piece. This hole is where the large bolt will go through so ensure the hole is created is the same diameter as the bolt. Two of the parts will become the forearm and the remaining piece the upper arm. The bolt creates the axis around which the upper and lower arm pieces rotate, representing the elbow.
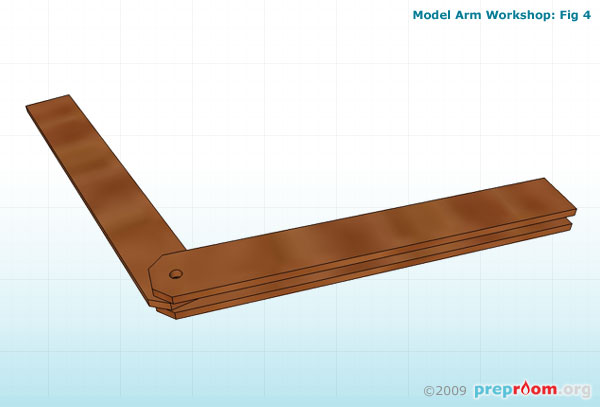
Fig 4: 3 pieces in position
Fig 4 shows how the three pieces need to be laid out. The bolt can be inserted at this point and secured with the nut in such a way that the joint is secure but the parts are allowed to move.
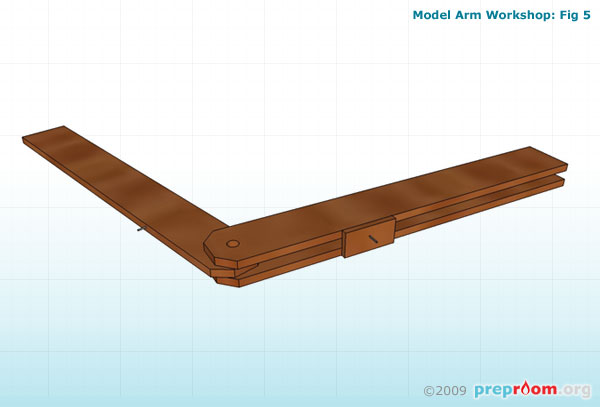
Fig 5: Small part of wood has been glued into place on the lower arm using PVA wood glue
In Fig 5, the small part of wood has been glued into place on the lower arm using PVA wood glue. This needs to be clamped for 24 hours until the glue has set. A small nail needs to be inserted into this wooden part and another at approximately 1/3rd of the way along the upper arm section. These nails will hold the rubber in place. A screw eye or hook may be used instead of the nails.
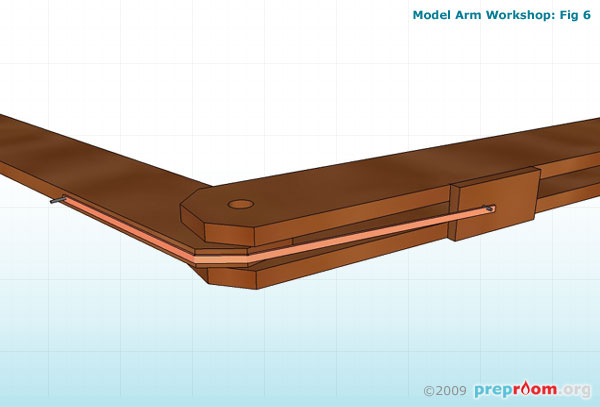
Fig 6: Lower band in place
Fig 6 shows the lower band in place. This represents the triceps. The band should be as strong and as large as possible. Heavy elastic cord may be used instead of the rubber. Ensure both ends are secure and that the band is fairly taught but has enough 'give' in it that the arm can be bent at will.
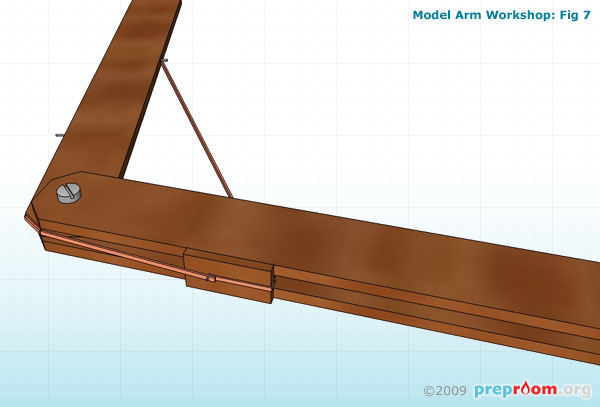
Fig 7: Upper band

Fig 8: Upper band
Fig 7 and fig 8 demonstrate where the upper band, representing the biceps, needs to go. Another nail or screw eye needs to be inserted into the inside upper arm part about 2/3rd from the elbow. The band should be looped under the additional piece of wood on the lower arm and secured to the nail/hook. Again, ensure this band is fairly taught but can still be stretched enough to allow the arm to bend.
The arm is now finished and can be painted if required. The arm may be mounted onto a board to assist in demonstrations by fixing the upper arm to an upright pillar. This will allow the lower arm section to be bent without the need to hold the upper arm.
If rubber band is used, it may deteriorate over time and may need to be replaced.
Disclaimer
Before attempting any of the construction projects featured on this website, ensure you have, and know how to use, the appropriate tools, components and safety equipment and are competent to undertake the project. These guides are for information only and we hold no responsibility for any accidents, injuries or damage caused by the use or misuse of any equipment, project or information contained within this website. In short - use common sense and stay safe!