| Difficulty Level: |
 |
very simple |
Parts and Tools
- 'D' size 1.5V battery
- 2 x pieces of sturdy copper wire (10cm)
- 30cm single core insulated wire
- flat magnet
- sticky tape
- wire cutters and strippers
|
|
Instructions
This guide shows how to construct a very simple motor. Students can easily make this model in lessons from very few parts and the result can be used to demonstrate the role of each part of the motor and how those parts combine to create movement.
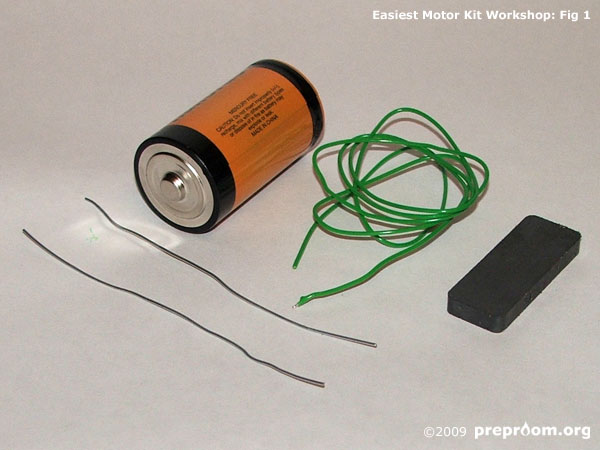
Fig 1: Equipment required
Fig 1 shows the equipment required. A standard 1.5V 'D' size battery acts as the power source for the motor and doubles as the mount for the other parts. A 30cm length of plastic coated single-core wire is also needed. A flat ceramic magnet and two 10cm lengths of stiff copper wire complete the kit.
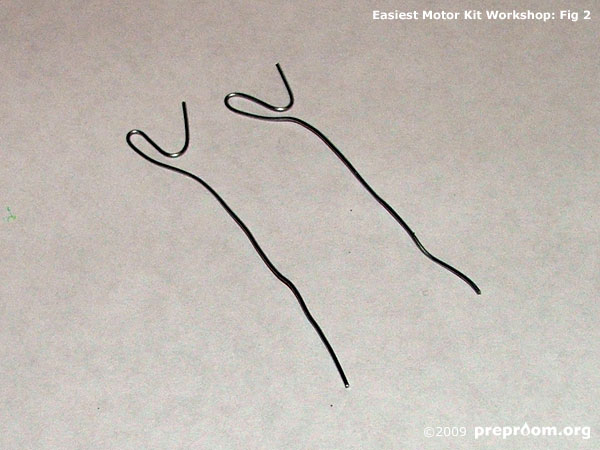
Fig 2: Two lengths of stiff copper wire
Fig 2 shows the two lengths of stiff copper wire. The wires should be bent in such a way as to form a 'Y' shape on one end of each. This is where the coil of wire will sit. Each part needs to be identical in shape and size.
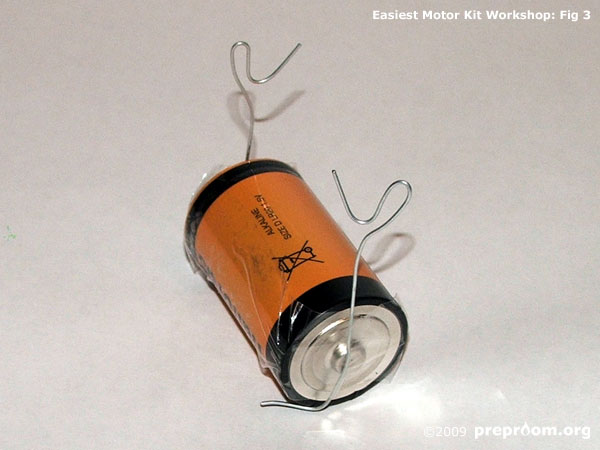
Fig 3: Copper wire arms attached to the battery
Fig 3 shows the stiff copper wire arms attached to the battery. Use sticky tape to firmly fix the arms to each battery contact. Make sure a good contact is made so that electricity can flow to the arm pieces and ultimately the coil of wire.
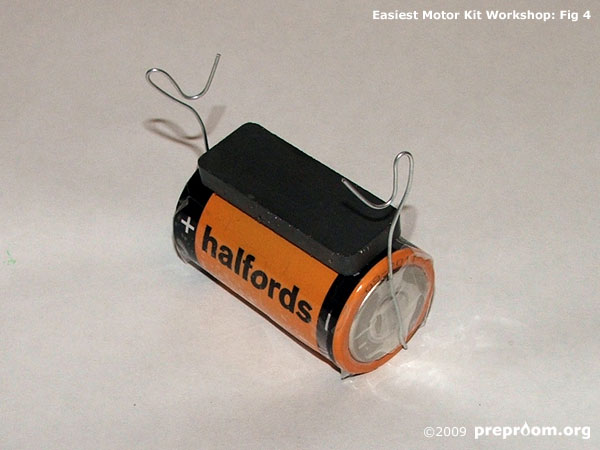
Fig 4: Magnet in place
Fig 4 shows the magnet in place. This can be magnetically attached to the body of the battery and should stay in place on its own. It does not matter which way up this magnet is attached.
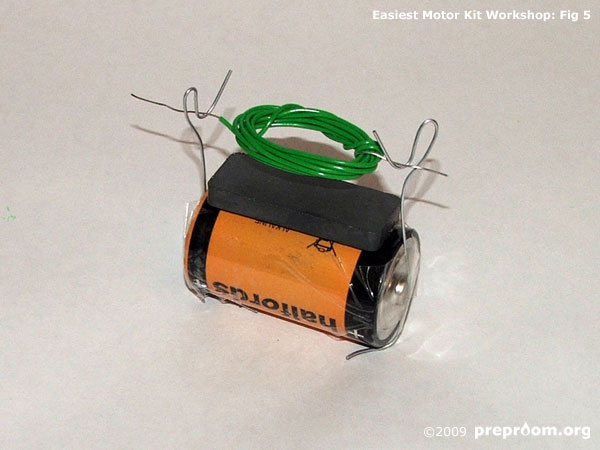
Fig 5: Insulated wire coiled into a loop
In fig 5, the length of insulated wire has been coiled into a loop with each end of the wire protruding about 3cm. These end pieces need to be stripped of insulation using the wire strippers and the whole coil placed on the arm parts. Ensure that the coil and arms are touching metal-to-metal so that there is electrical contact. As soon as the coil is put in place, it should start to spin, or at least wobble slightly. A slight persuasion may be required to get the coil spinning consistently.
The coil will need to be carefully balanced by wrapping an equal amount of wire on each side of the loop. Trial and error may be required to get a uniform balanced shape.
When in place, the coil is effectively causing an electrical short across the battery and so will heat up considerably. Do not leave the coil in place for more than a few seconds to prevent the battery or wires overheating.
Disclaimer
Before attempting any of the construction projects featured on this website, ensure you have, and know how to use, the appropriate tools, components and safety equipment and are competent to undertake the project. These guides are for information only and we hold no responsibility for any accidents, injuries or damage caused by the use or misuse of any equipment, project or information contained within this website. In short - use common sense and stay safe!