MES lamps in holders are used in most schools. Whereas some schools use just the plastic holders connected to thin insulated wire, some schools purchase commercial holders with integral 4mm sockets. The problem with simply using individual lamp holders and insulated wire is that the students need to unscrew the terminal screws to attach the wire and these can easily be lost. Also tightening and unscrewing the screws repeatedly can damage the terminal.
Whereas commercially available MES lamp holders cost from £5-£10 each, this guide shows how to make a pupil proof lamp holder with built-in 4mm sockets for less than £1 each.
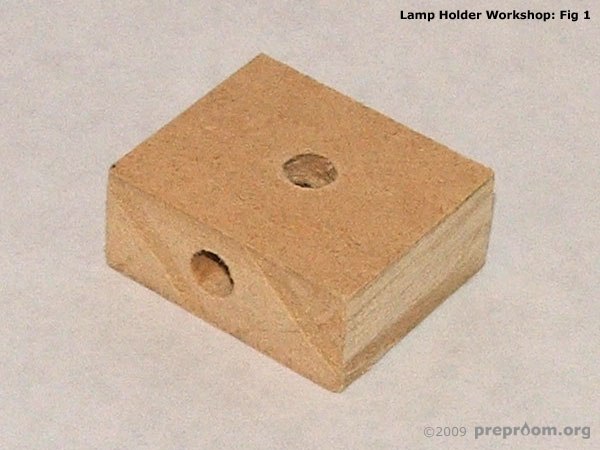
Fig 1 shows the MDF piece which has been cut, sanded and drilled. The MDF needs to be cut into pieces 55x55mm and at least 12mm deep. Three 4mm holes need to be drilled in each piece. One hole should be drilled on each of two sides and one in the middle of the top. The three holes need to link up and so a small screwdriver may need to be inserted to remove any debris.
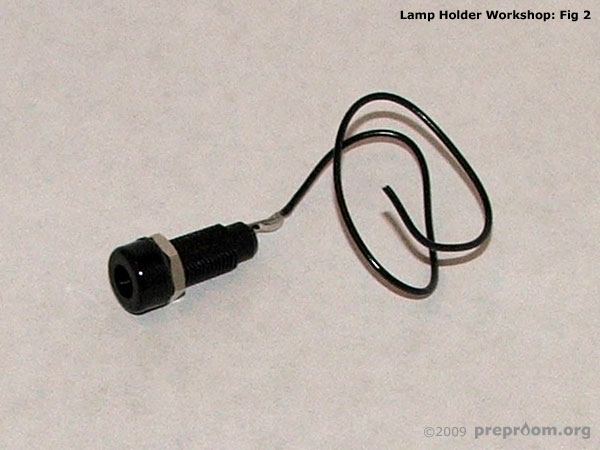
Fig 2 shows one of the two 4mm sockets which need to be soldered to a short length of insulated copper wire. Ensure the soldered joint is strong.
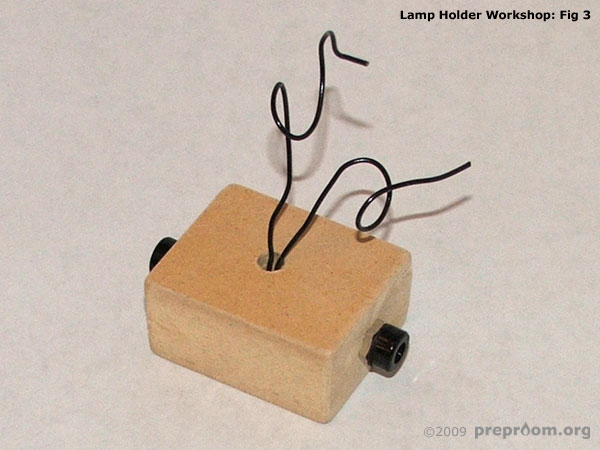
Fig 3 shows how the 4mm sockets should be inserted into the two side holes. The ends of the wire need to exit through the top hole so some gentle persuasion may be required to achieve this. The sockets should be a tight fit in the drilled holes and should not need additional glue.
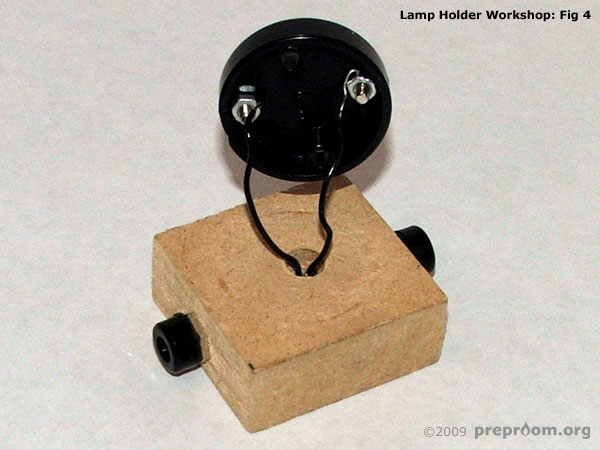
Fig 4 shows the connections that need to be made to the underside of the lamp holder. Unscrew the terminal screws and strip about 10mm of insulation from each wire end. Loop each wire around each of the screw terminals and tighten the screw while holding the nut with a pair of snipe nosed pliers.
Ensure the screws are as tight as possible. To make the screws tamper-proof, you may want to apply a small blob of glue from a glue gun onto each screw head.

Fig 5 shows the completed lamp holder. Glue from a glue gun should be applied to the base of the holder which should keep the parts firmly in place. The finished unit is virtually indestructible and should last a long time without any need for maintenance.
Although this guide demonstrates how to make MES holders, scaling up the size of the MDF block enables construction of larger 12V SBC lamp holders. In fact any type of low voltage lamp holder may be constructed in this way.