The Doppler effect describes the change in frequency and wavelength of a wave perceived by an observer when the source of the wave is moving. The effect is commonly heard when an emergency vehicle with a siren moves towards or away from an observer. The change in frequency of the sound wave can be heard as a slight shift in pitch.
Doppler balls area available to purchase through lab suppliers which consist of a buzzer or sounder inside a soft ball. The ball can be thrown around and the sound of the waves observed. This guide shows how to construct a similar Doppler device which can be whirled overhead using a length of string. The principles are the same as the Doppler ball and the effects should be able to be heard by the whole class.
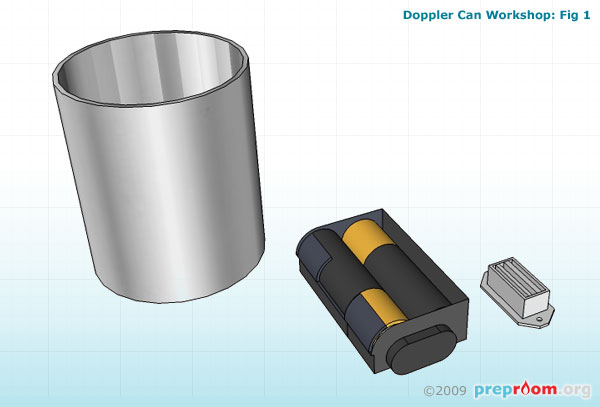
Fig 1 shows a small steel food can which can be used as the main body of the device. Also in the diagram are a set of 'AA' batteries in a holder and a 3V buzzer. The battery holder and buzzer can be purchased through Rapid, RS or Maplin and both usually come with flying leads ready for soldering. A miniature slide switch, also required, can be purchased from the same electrical suppliers.

Fig 2 shows the circuit diagram for this model. The circuit is very simple and includes a slide switch, buzzer and cells. Don't solder the parts together just yet because the buzzer first needs to be located on the underside of the can.

Fig 3 shows how the cells should be mounted. Use a glue gun to secure the cell holder to the inside of the can and a large block of craft foam or cork should be secured inside which will help hold the cells in place. A small hole needs to be made in the underside of the can with the bradawl. This hole will enable the leads of the buzzer to pass through. Two further holes need to be made which will allow small bolts to secure the buzzer into place.
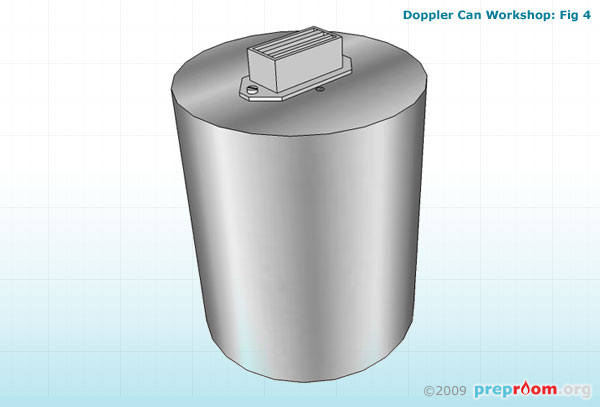
Fig 4 shows the underside of the can. The buzzer should be secured in place using two small nuts and bolts. As a further precaution, the buzzer should also be glued into place using a glue gun. Pass the flying leads from the buzzer through the small hole into the can.
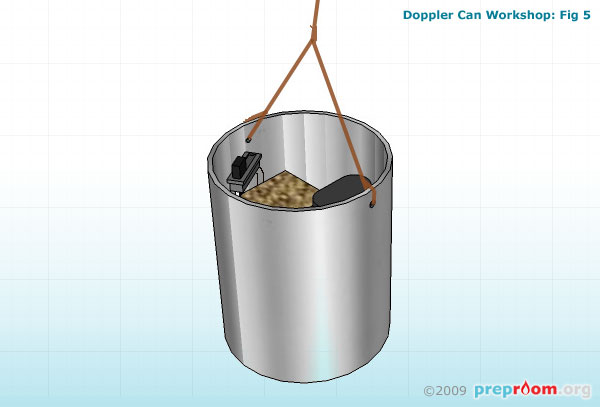
Fig 5 shows the finished model. One contact on the slide switch should be soldered to one of the flying leads of the buzzer. The other switch contact should be soldered to one terminal on the cell holder and the remaining cell holder terminal needs to be soldered to the remaining buzzer lead, completing the circuit. All connections should be made with short lengths of insulated copper wire and the soldered sections should be taped using insulating tape so that the connections cannot accidentally touch during use.
Activating the switch should now result in the buzzer sounding.
Two holes needs to be made using the bradawl in the sides of the can near the top lip. Loop some strong string through the holes and tie the ends tightly. About 500mm of string is required to achieve a large enough whirling circle.
The device can be whirled horizontally overhead to achieve the Doppler effect. A safety screen should be used between the demonstrator and observers and eye protection should be worn.