A thermal actuator is an electro-mechanical device which moves or actuates when an electrical current is applied. In this model, a nitinol spring is used as the movement mechanism. Nitinol springs contract when heated or an electrical current is passed through them and so can be used to manually lift, open or close a door, a switch or move an object.
Thermal actuators are used in fire alarm systems (where the change in temperature causes a material to expand or change its physical properties, setting off an alarm), temperature controlled louvers and robotics.
This model is a simplistic demonstration of the abilities of the 'smart material' nitinol and shows how electricity can be converted into movement.
More information about nitinol springs can be found in our Equipment section.


Fig 1 and fig 2 show the base layer of MDF. This should be cut and sanded to remove any rough edges. Make sure you use the relevant PPE when cutting and sanding.
Two holes need to be drilled to accommodate the two 4mm sockets. Drill these near one end of the MDF.
A third hole needs to be drilled near the centre of the base. This will act as a tunnel for the connecting wires ensuring they are out of sight.
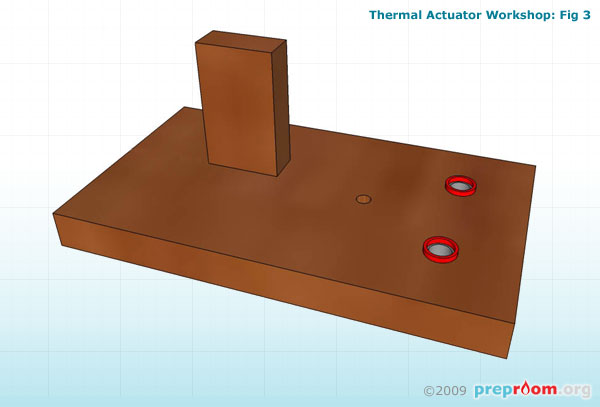
Fig 3 shows the upright piece of MDF in place. This needs to be glued using PVA wood glue and held in place using a 'G' clamp for 24 hours until secure.

Fig 4 shows how the lolly stick should be attached to the upright section using a round nail. The nail acts as a pivot, around which the lolly stick needs to be able to rotate freely. The nail can be situated anywhere along the lolly stick but the height needs to be determined by the closed size of the nitinol spring you are to use. Make sure the spring can fit stood upright beneath the lolly stick when the stick is horizontal.
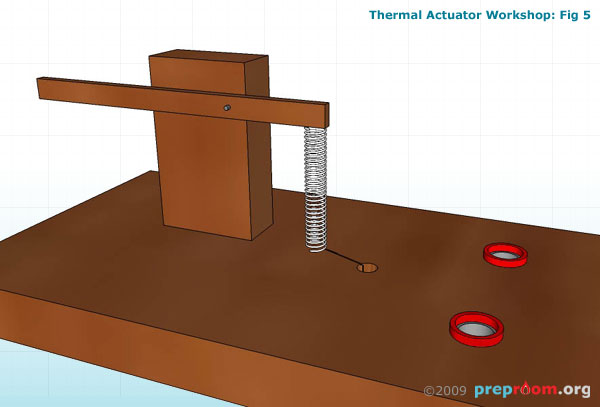
Fig 5 shows the spring in place. This should be fixed to the base using a panel pin and/or glue from a glue gun. The other end needs to be attached to the end of the lolly stick using glue. A small hole can be made in the stick and a loop or two of the spring may be threaded through so secure it more thoroughly.
Wrap a length of insulated wire around the bottom coil of the spring several times so that it is electrically connected. Poke the other end through the middle hole in the base.

Fig 6 shows the other connecting wire in place. Again this is a length of plastic coated insulated wire only this time it needs to be slack to allow for the spring to be extended. Glue part of the wire to the upright section using a glue gun and coil the slack part lightly so that it can extend easily. Wrap the end several times around the top coil of the spring so that it is electrically connected and poke the other end through the hole.

Fig 7 shows the underside of the board. The two wires that have been poked through need to be connected to the 4mm socket contacts by soldering. Ensure the lengths of wire are taught. These can be glued in place using a glue gun.
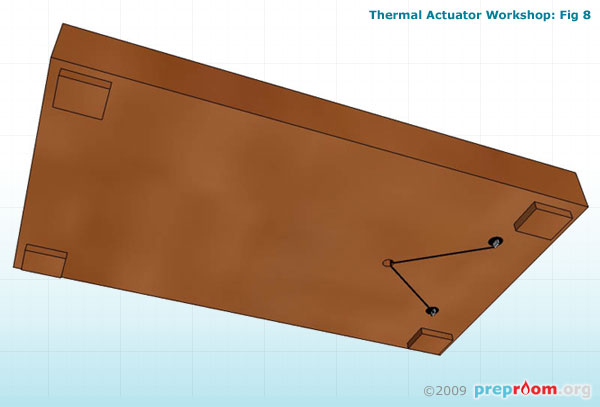
Fig 8 shows the feet in place. These can be purchased from Rapid or Maplin or can simply be squares of MDF glued into place. The purpose of the feet is to make sure the bottom connectors on the 4mm sockets are not in contact with the table top.
The model is now finished.

Fig 9 shows the model with the spring extended. This is the start position. Gently extend the spring and then connect to a power supply. The voltage and current that needs to be applied depends upon the type of nitinol spring you are using. Recommendations are usually supplied with the spring.
As the current is applied, the spring should contract, moving the lolly stick as it does. It is this movement that can be used to open a door or close electrical contacts in commercial applications.
Ensure the spring has cooled sufficiently to reset the device and extend the spring once more. Only apply the current for a very short amount of time until the device actuates. Prolonged current may cause the spring to overheat or become irreparably damaged.