This guide shows how to construct a fairly complex wave model which can produce transverse waves. Polystyrene balls are attached to wooden rods which then sit on a taught length of string. When one ball is moved, the others around it also move in a wave formation. Standing waves can be produced using this model and oscillation of a single particle can be seen by observing a single ball.
More background information about waves can be found in our Info Library section.
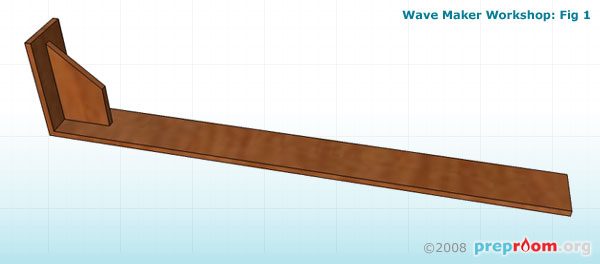
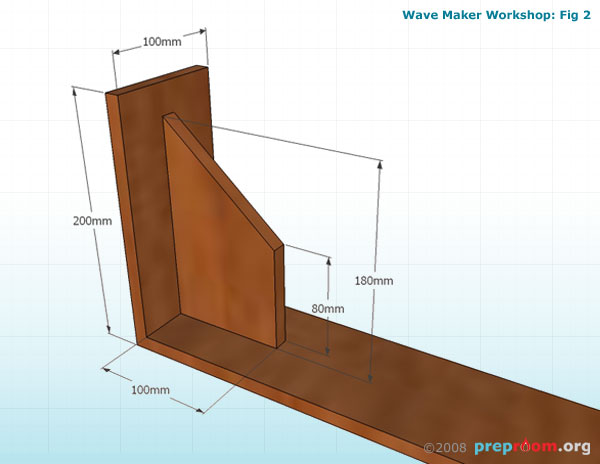
Fig 1 and fig 2 show the construction of the base of the model. All timber needs to be 12mm blockboard or MDF, chosen for its strength. The base of the model needs to be approximately 1000mm long and 100mm wide. Fig2 shows the end pieces which need to be glued and nailed into place and the supports which are a piece of timber 100 x 180mm need to be cut as in the diagram so that they become 80 x 100 with an angled cut and pointed top.
Sand down any rough edges with sandpaper.

Fig 3 shows one end piece of the model. Both ends need to look like this with two large nails pinned into the top of the uprights approximately 40-50mm apart. These nails will provide the fixings for the string so make sure they are securely fixed.

In fig 4, the string has been added. At one end of the model, tie the string around the nails securely, pull the string taught and wrap around the nails at the other end. Hammer two more nails into the end of the upright section as in the diagram. These will provide anchors for the ends of the string which will help keep them taught. The benefit of this is that the string can be adjusted when needed to tighten it because over time the string will stretch slightly.
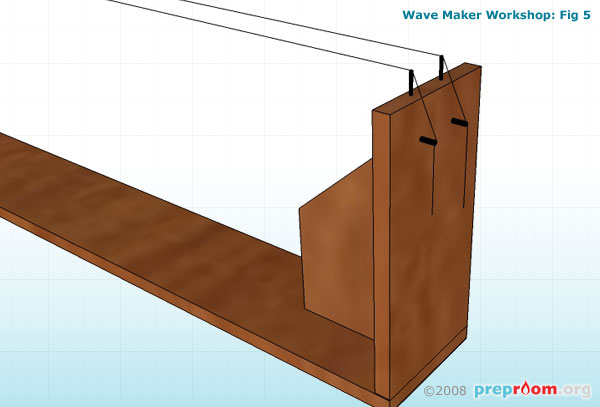
Fig5 provides a close-up of the end piece with the string wrapped around the anchor screws.


Fig 6 shows the first part being placed on the strings. Take a wooden kebab skewer approximately 200mm long and stick a polystyrene ball on each end. You may need a dab of glue to hold these in place. Make about 30 of them and ensure they are all the same size and shape. Lay one onto the strings so that it balances. Take 40mm of nichrome wire and wrap it around each part of the wooden skewer that touches the string. Use snipe nosed pliers to wrap this tightly so that the skewer is securely connected to the string. Cut off any excess wire using wire cutters.
Repeat these steps until you have all of the balls and skewers in place (see fig 7).
You may need to make more skewers so that they are spaced equally along the length of the string and the balls have a gap between them of about 10mm. It is essential that the skewers are very tightly attached to the string using the wire because they may come loose if not.

Fig 8 shows another angle of the finished wave maker. To set the balls in motion, choose a ball at one end, sharply move it downwards and let go. The other balls should move in a wave pattern along the length of the model. If the string is taught enough the wave may return along its length. You may move one ball up and down to create standing waves.

Fig 9 shows a photograph of a similar wave model.